5 Best Ways to Perform a Load Test on a New Hoist?

Time:2026-10-02 Author:Liam
0%

A new hoist may look flawless, yet hidden defects can appear under real working loads. How to perform a load test on a new hoist is therefore a safety question, not merely an installation task. A controlled test confirms lifting capacity, brake performance, limit-switch operation, structure stability, and operator readiness before production begins.

Industry data supports this caution. The U.S. Bureau of Labor Statistics reported 5,283 fatal occupational injuries in 2023, including incidents involving transportation, material handling, and struck-by hazards (BLS, Census of Fatal Occupational Injuries, 2023). These figures do not identify every hoist-related event, but they show why lifting equipment deserves disciplined verification. OSHA 29 CFR 1910.179 and ASME B30.16 also emphasize rated capacity, inspection, safe operation, and competent personnel. Local requirements may differ.

Small errors matter.

This guide presents five practical testing methods, from document checks and visual inspections to controlled proof loading and functional testing. It focuses on measurable evidence: the nameplate rating, test weight, lifting height, brake holding time, unusual noise, hook deformation, and chain or wire-rope behavior. Manufacturer instructions should remain the primary reference, because similar-looking hoists can have different test limits and procedures.

A useful test is never a rushed demonstration. It needs a barricaded area, calibrated equipment, clear communication, and a written record. One limitation deserves attention: a successful no-load or partial-load test cannot prove every internal component is reliable. When results seem unusual, stop the test and involve a qualified lifting-equipment professional. Confidence must come from evidence, not appearance.
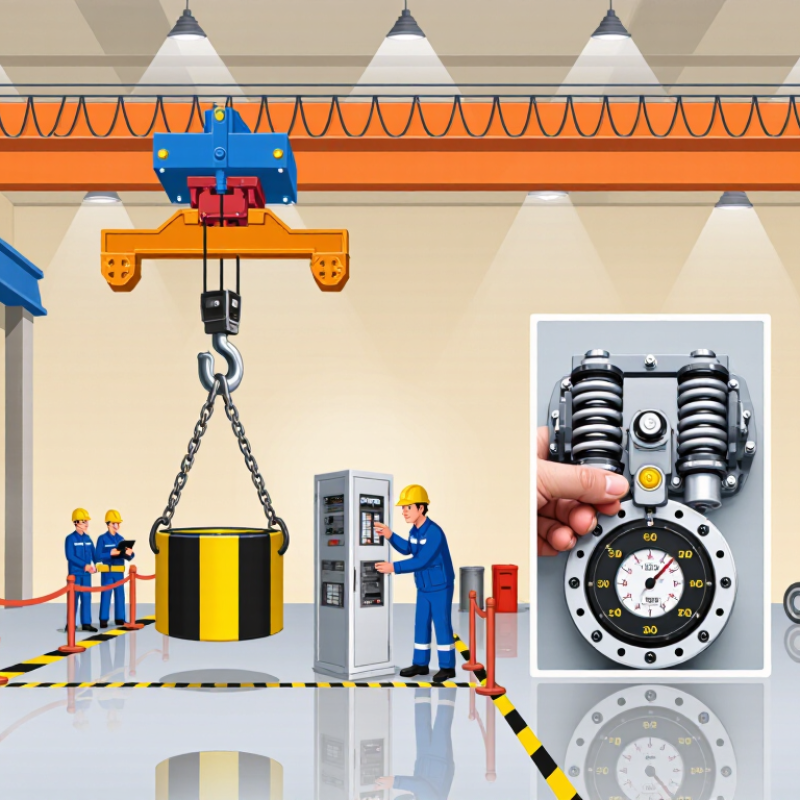
5 Best Ways to Perform a Load Test on a New Hoist?

Review Hoist Specifications, Test Limits, and Applicable Safety Standards

5 Best Ways to Perform a Load Test on a New Hoist?

A safe load test begins with the hoist specifications, not the test weight. Confirm rated capacity, duty class, lift height, reeving, power supply, and brake type. Check the hook, chain, wire rope, latch, controls, and attachment points. Use a competent inspector and follow the manufacturer’s instructions. Never treat rated capacity as a suggested target.

Test limits must match the applicable rules. ASME B30.16 addresses overhead and underhung hoists, while ASME B30.21 covers lever-operated hoists. Local requirements may also apply, including OSHA inspection rules or LOLER requirements in the United Kingdom. Use a certified load cell when possible. Apply a controlled proof load only when the governing specification permits it. Then perform a gradual lift, a short hold, and a controlled lower. Watch for brake drift, unusual noise, chain climbing, frame distortion, or unstable rigging.

Record the serial number, test load, date, inspector, equipment condition, and measured results. Keep photographs of critical connections. The International Labour Organization reported 2.93 million work-related deaths and 395 million nonfatal injuries globally in 2019. That figure supports disciplined verification, even for a new hoist. New equipment can still arrive damaged. I once saw a seemingly minor hook-latch defect delay commissioning. Small defects matter. If readings seem inconsistent, stop and investigate rather than repeating the lift. Load testing proves performance under defined conditions; it does not replace routine inspections, operator training, or a review of changing site risks.

Inspect the Hoist, Supporting Structure, Rigging, and Load-Test Equipment

5 Best Ways to Perform a Load Test on a New Hoist?

Inspect the hoist before applying test weight. Check brakes, hooks, chains, wire rope, limit switches, guards, and warning labels. Look for bent hooks, cracked welds, oil leaks, or unusual gear noise. Examine the supporting structure, including beams, runway rails, end stops, bolts, and welds. Confirm the structure’s rated capacity with approved drawings. OSHA safety data recorded 72 crane-related fatalities in 2016, showing why small defects deserve serious attention.

Inspect every sling, shackle, spreader beam, and lifting point. Confirm identification tags, working load limits, inspection dates, and compatible angles. Never assume new rigging is defect-free. Select calibrated test equipment with a capacity above the planned load. Verify the load’s weight through certified records, not guesswork. Follow the manufacturer’s procedure and applicable requirements, such as ASME B30.16. Increase the load in controlled stages, pause at each stage, and observe deflection, brake holding, and abnormal movement. Record readings, weather conditions, equipment details, and inspector qualifications. HSE reported 138 worker fatalities in Great Britain during 2023/24, reinforcing the value of disciplined preparation.

Tips: Clear the test area. Use barriers and a signal person. Keep workers away from suspended loads. Stop immediately after unexpected movement, sound, or deformation. Take photographs before and after testing. The checklist may miss something. A second qualified review is often worth the delay. Do not release the hoist until all defects are corrected and the test record is signed.

Perform a No-Load Functional Test Before Applying Any Test Weight

Before applying any test weight, perform a no-load functional test in a controlled area. This step verifies basic movement without adding lifting stress. A qualified operator should inspect the hook, latch, wire rope or chain, controls, guards, and supporting structure. Check that fasteners are secure and no part is bent, cracked, or contaminated. Confirm the travel path is clear. Keep people outside the controlled zone. Small details matter.

Run the hoist through its intended functions at low speed, following the equipment manual and site procedure. Test raising, lowering, stopping, and direction controls. Check the emergency stop, limit devices, brake engagement, and pendant response. Listen for grinding, clicking, slipping, or uneven motion. Watch the hook for twisting and sudden movement. A no-load test should feel controlled, not merely operational. If a control responds late, stop immediately. Do not press harder or repeat the command.

From field experience, operators sometimes focus on the motor and overlook the brake or upper limit. That mistake can become serious under load. Record the test time, operator, observed functions, and any irregular sound. Correct defects before introducing test weight. I have also learned that a clean first test can create false confidence; a warm component may behave differently later. Recheck after a short pause. If the procedure is unclear, seek competent technical guidance instead of guessing.

5 Best Ways to Perform a Load Test on a New Hoist? - Perform a No-Load Functional Test Before Applying Any Test Weight

Test Method Recommended Sequence Typical Load Condition Main Checks Acceptance Criteria Safety Controls
1. No-Load Functional Test Perform before attaching any test weight. Inspect the installation, energize the hoist, and operate each control through its complete range. No suspended load; hook and lifting attachment remain unloaded. Pendant or remote controls, motor direction, brake release, upper and lower limit devices, emergency stop, hook rotation, chain or wire-rope reeving, and abnormal noise. Smooth operation in both directions; controls respond correctly; limits and emergency stop function; no binding, excessive vibration, damaged components, or unusual noise. Keep personnel clear of moving parts. Do not bypass limit switches or safety devices. Stop immediately if any fault is observed.
2. Rated-Capacity Dynamic Test After the no-load test, attach a verified test load and raise it a short distance. Operate hoisting, lowering, and permitted travel functions at controlled speed. Up to 100% of the hoist's rated capacity, according to the approved test procedure. Starting and stopping, brake response, load control, motor performance, hook alignment, load chain or wire-rope movement, and support structure behavior. The hoist lifts, holds, lowers, and controls the rated load without slipping, shock loading, structural distortion, overheating, or abnormal sound. Use a calibrated load with a known mass. Keep the load as low as practical during initial movement and establish an exclusion zone.
3. Static Holding and Brake Test Lift the authorized test load, stop the hoist, and hold the load suspended for the time specified by the applicable regulation or approved test plan. Normally the rated capacity; any higher proof load must be specifically authorized by the manufacturer, engineer, or governing requirement. Brake holding, unintended lowering, load position, hook block stability, supporting beam or trolley response, and visible deformation. No uncontrolled descent, brake slip beyond the permitted limit, permanent deformation, cracking, or damage to the hoist, support, or lifting accessories. Never stand beneath a suspended load. Do not leave a test load unattended. Use secondary controls and barriers where required by the risk assessment.
4. Travel, Positioning, and Limit-Device Test With an authorized load attached, test trolley or bridge travel where applicable, then verify stopping functions and operating limits in a controlled area. Begin with no load or a light load; progress to the rated load only when the equipment and installation are verified. Travel brakes, end stops, travel limits, hook positioning, pendant controls, cable or festoon movement, clearances, and load sway. The hoist stops in a controlled manner, limits operate before hazardous overtravel, and no collision, derailment, snagging, or unstable load movement occurs. Do not use operational limit switches as routine stopping devices unless the equipment instructions specifically allow it. Maintain clear travel paths.
5. Post-Test Inspection and Documentation After testing, remove the load, isolate the equipment if necessary, inspect all relevant parts, and record the test results before placing the hoist into service. No suspended load during inspection; record the maximum test load used and the test duration. Hooks, latches, chain or wire rope, sheaves, gears, brakes, fasteners, welds, electrical connections, overload protection, labels, and support structure. No new cracks, permanent deformation, excessive wear, loose fasteners, electrical damage, lubricant leakage, or change in operating performance. Defects are corrected before use. The record should include equipment identification, rated capacity, test load, test date, inspector qualification, observations, corrective actions, and final disposition.
Important: Test loads, holding times, inspection intervals, and allowable limits must follow the hoist manufacturer's instructions and the applicable local regulations or recognized lifting-equipment standard. A qualified person should approve and supervise the test plan.

Conduct a Rated-Load Test and Observe Hoist Performance Under Load

5 Best Ways to Perform a Load Test on a New Hoist?

Conduct a Rated-Load Test and Observe Hoist Performance Under Load

A new hoist needs a controlled rated-load test before routine lifting begins. Use a certified test weight that matches the hoist’s rated capacity. Inspect the hook, chain or wire rope, brake, controls, and mounting points. Check for damage, loose fasteners, and unusual wear. Keep nonessential workers outside the test area. Follow the manufacturer’s instructions and applicable local requirements.

Lift the load only a few inches first. Stop and confirm that the brake holds without slipping. Then raise, lower, and travel the load through the planned operating range. Watch the hook for twisting and the load for unexpected swinging. Listen for grinding, clicking, or changes in motor sound. Observe slow movement carefully. It may indicate control, lubrication, or mechanical problems.

Record the test weight, time, operator, and equipment condition. Measure stopping distance when practical. Check whether the hoist heats excessively during repeated cycles. A stable result matters more than a quick result. Do not exceed the rated capacity to “prove” strength. That approach creates unnecessary risk and weakens the value of the test. A careful technician may find a minor issue, such as uneven chain movement, before it becomes a serious failure. Pause the test when conditions change. Recheck the setup, because even a good procedure can be applied imperfectly.

Document Results, Correct Defects, and Approve the Hoist for Service

A reliable hoist load test starts with a verified plan. Check the rated capacity, test load, anchor points, and measuring equipment. Use a controlled, staged load increase rather than one sudden lift. Watch for abnormal noise, brake slip, frame distortion, hook damage, or uneven movement. Stop immediately when evidence looks uncertain. Never “test through” a suspected defect.

Record the essentials. Include the hoist identification, date, operator, inspector, test weights, load percentages, readings, photographs, and weather conditions. Capture the starting and final condition. HSE’s 2023/24 statistics recorded 138 worker fatalities in Great Britain, including 50 falls from height. These figures are not hoist-specific, but they underline the need for disciplined evidence and safe exclusion zones. A missing photograph can weaken an otherwise sound inspection.

Correct every defect before approval. Tag the hoist out of service, describe the failure precisely, and assign corrective action to a qualified person. Re-test after repairs, using the same acceptance criteria. Then obtain a signed inspection record and service authorization from the responsible competent person. Keep the report with maintenance history and schedule the next examination. Approval should be earned by evidence, not confidence. I have seen paperwork completed neatly while a brake adjustment remained undocumented. That is a useful warning. A clean form does not prove a safe hoist. Sources: UK Health and Safety Executive, Fatal injuries in Great Britain, 2023/24; ISO 9927-1, Cranes—Inspections.

FAQS

What should be checked before testing a new hoist?

Confirm rated capacity, duty class, lift height, reeving, power supply, and brake type. Inspect the hook, latch, chain, rope, controls, and mounting points.

What test weight should be used?

Use a certified test weight matching the rated capacity. Never exceed that capacity to “prove” strength. That adds avoidable risk.

Who should conduct the load test?

A competent inspector and trained operator should manage the test. Follow the equipment instructions and applicable workplace safety requirements.

How should the first lift be performed?

Lift the load only a few inches. Stop and check whether the brake holds without slipping. Keep nonessential workers outside the test area.

What signs may indicate a problem?

Watch for brake drift, chain climbing, hook twisting, frame distortion, unstable rigging, or unusual noise. Grinding and clicking deserve attention.

What should happen during the main test?

Raise, lower, and travel through the planned operating range. Use controlled movements. Watch for swinging, slow motion, excessive heat, or changing motor sounds.

What records should be kept?

Record the serial number, test load, date, operator, inspector, equipment condition, and measured results. Add photographs of critical connections when useful.

Does a successful load test replace routine safety checks?

No. It does not replace inspections, operator training, or changing site-risk reviews. The checklist helps, but it is not magic.

What should happen if test readings seem inconsistent?

Stop the test and investigate the setup. Recheck rigging, connections, instruments, and equipment condition before trying again. Repeating blindly is poor practice.

Conclusion

How to perform a load test on a new hoist begins with a careful review of the hoist’s rated capacity, operating specifications, test limits, and applicable safety requirements. Before testing, inspect the hoist, supporting structure, rigging, anchor points, and load-test equipment for damage, correct installation, and secure connections. A no-load functional test should then confirm that controls, brakes, limit devices, and emergency features operate smoothly.

Next, conduct a controlled rated-load test using verified test equipment and a suitable test area. Gradually apply the approved load while observing lifting, lowering, braking, noise, vibration, and structural stability. Do not exceed authorized limits or continue if any abnormal condition appears. After testing, record the load, equipment details, observations, and results. Any defect must be corrected and verified through follow-up inspection before approval. Only qualified personnel should authorize the hoist for service once all test requirements have been satisfied.

Liam

Liam

Liam is a dedicated marketing professional with a profound expertise in the industry, where he excels at highlighting the unique advantages of our core products. With a keen understanding of market trends and consumer needs, Liam frequently updates our company’s professional blog, providing......